


Onboarding The Things Indoor Gateway

1.
Take a photo of the back label to have the information available later.
2.
Plug the gateway into the socket and press the reset button on the lower side for about 5 seconds, if necessary with a thin object like a pencil, until the LED on the upper side of the gateway flashes red and green.


3. Press the setup button at the top of the gateway for about 10 seconds until the LED flashes red quickly.
4.
In your network overview you will now find MINIHUB XXXXXX, XXXXXX is the gateway ID that you will find on the label of the gateway. There is also the password for the gateway.

5.
Open a browser window and enter the IP address 192.168.4.1.

6.
Search for your own WLAN network and enter the password of the WLAN, then press Save & Reboot.

If this process worked, the gateway will flash for a few seconds . green while it connects to the network. After that, the device will flash red alternately for a few seconds while it sets up.
If this did not work, see if the gateway is still connected in the network list and reconnect if necessary.
If the configuration was successful, the LED will turn solid green after a short time. The LoRaWAN network is now active and ready to receive data packets.

The Things Network Anmeldung
7. Create an account and click on >>Go to Gateway<<

8. The "Collaborator ID" is pre-filled, enter the Gateway EUI. The EUI is found underneath the QR-Code. Enter the first 6 digits, followed by FFFE and the remaining bits.
The "Claim authentication Code" is the WLAN Password, which is also found on the sticker on the backside .
The Gateway ID can be picked by yourself in small letters and numbers.
Regarding frequency, please choose >> Europe 863 - 870 MHz (SF9 for RX2 - recommended) <<

Congratulations! You have commissioned your The Things Indoor Gateway and connected it to the TTN backend!
Onboarding KLAX to TTN
1.
If you are not logged in yet, log in first. Then go to >>Go to application<< and then click on >>Add application<<.
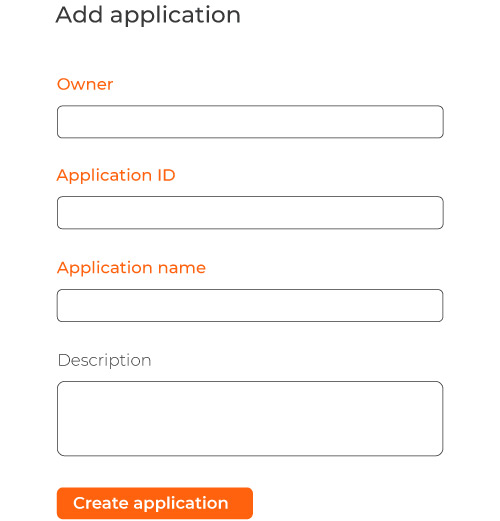
2. Select the owner and select and enter the Application ID from digits, small letters and hyphens. Also assign an Application Name. If desired, you can enter a description, then click >>Create application<<.
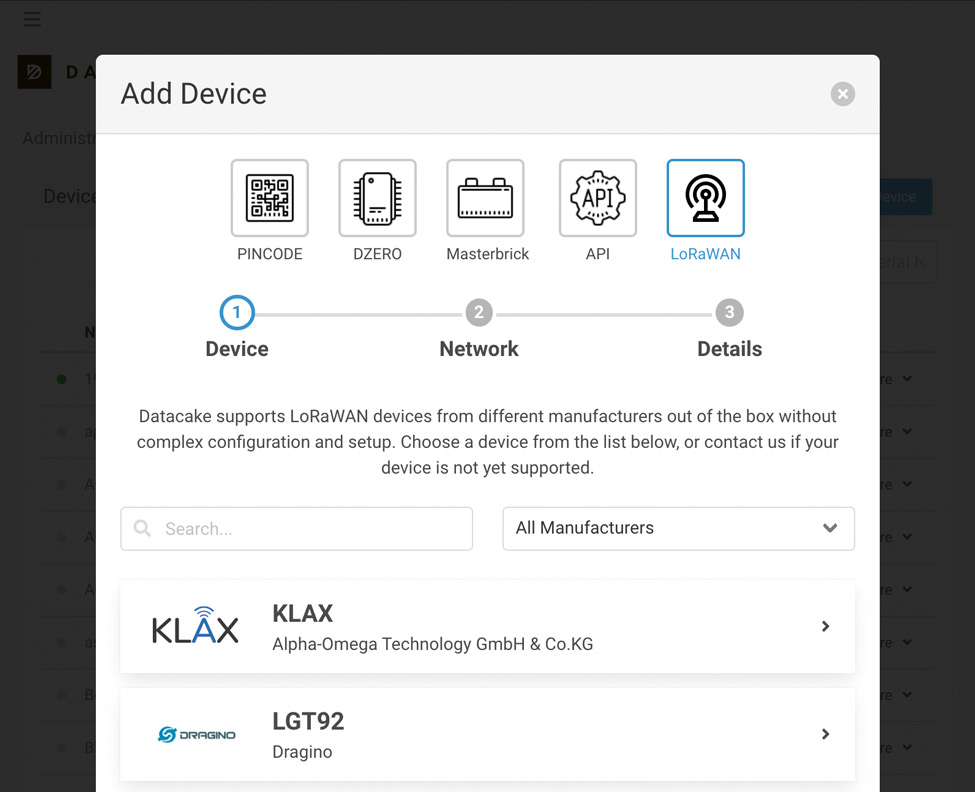
- 3. In the right menu go to >>End devices<< and in the top right submenu click on >>Add end devices<<. In the following screen, select Alpha-Omega Technology GmbH & Co. KG for >>Brand<<, then select KLAX for >>Model<<.
-
- For the hardware version, select version 2 when onboarding a current KLAX. If you want to onboard an older model without external antenna, select version 1.
Afterwards, the frequency, App EUI, DEV EUI and App Key must be entered. You should have received this information by e-mail and/or it was printed out and included in the package. Finally, the device must be created with the button >>Register end device<<.
4. Slightly press in the elevation at the bottom of the KLAX and slide it down to open and then insert the enclosed battery. Please do not use use commercial battery with 1.5V, you may damage the sensor.

- 5. Place the KLAX without the lid on the electricity meter to see the LED display of the sensor.

| Blink Code | Meaning |
|
1 x 1s
|
Initialization completed |
|
500ms (blinking)
|
Startup test running |
|
1 x 2s
|
Startup test result IR & LoRa OK
|
|
2 x 200ms
|
Startup test result IR OK, LoRa error |
|
3 x 200ms
|
Startup test result IR Fehler, LoRa OK
|
|
4 x 200ms
|
Startup test result IR & LoRa error |
The LED will start flashing red. If the startup test fails, the blink code is repeated every 3 seconds for 30 seconds before the startup test is repeated. This is repeated a maximum of 5 times before the sensor turns off. To restart the sensor afterwards, the battery must be removed for at least 2 minutes.
6.
After successful test (1 x 2s flashing) you can put on the lid.

Congratulations! You have put your KLAX into operation.
KLAX Onboarding to Datacake
1. Datacake registration
Open your browser and enter the following URL in the address bar: https://datacake.co/
If you don't have a Datacake account yet, you can sign up at any time.
2. Select device
You will find the KLAX in the ready-made templates. The templates make onboarding particularly easy.
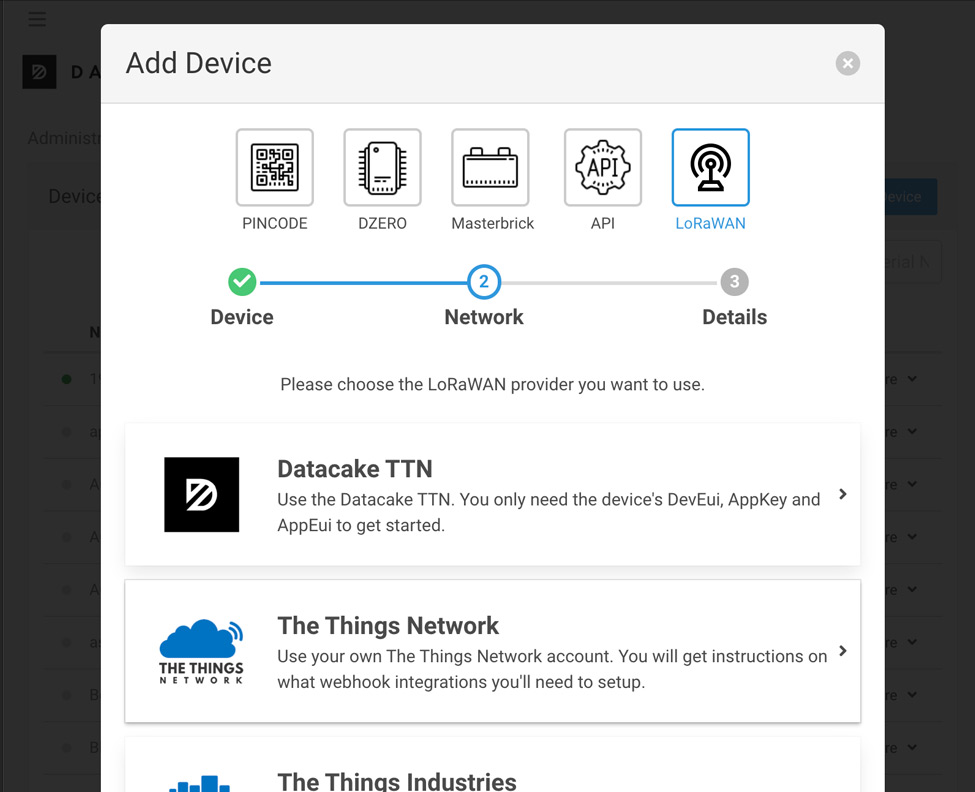
3. Select LoRaWAN network server
Many common LoRaWAN network servers, such as TTN (The Things Network), are already on board and connect with one click. Alternatively, Datacake provides its own TTN instance.
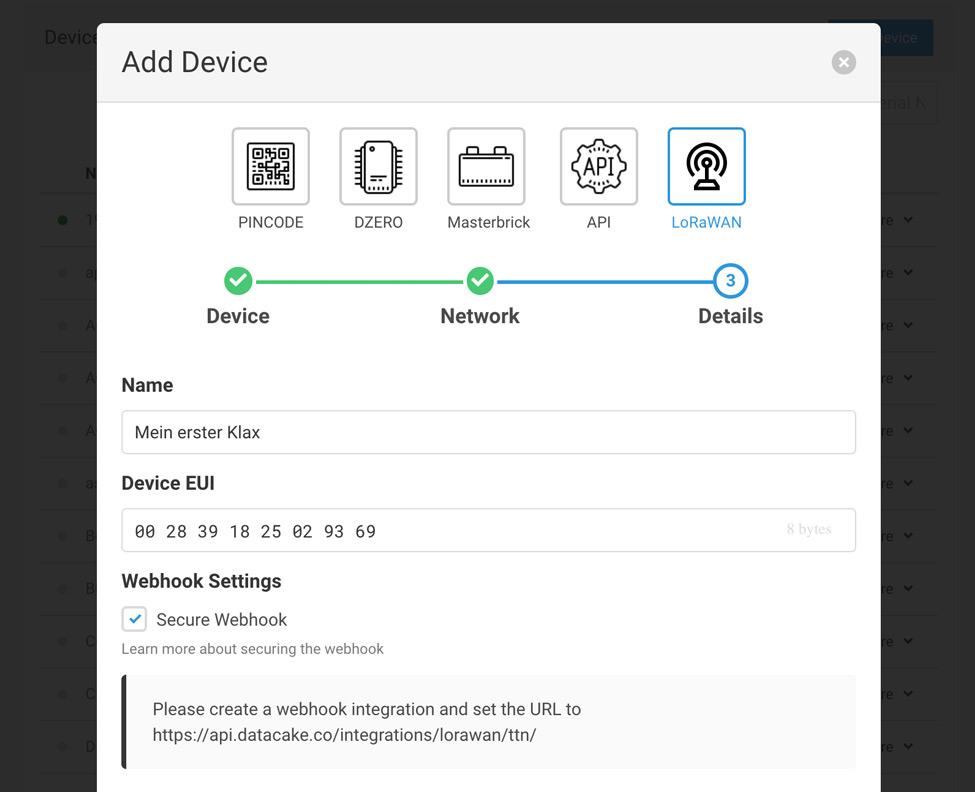
4. Enter DevEUI and get started
Already the LoRaWAN device is integrated into Datacake and their values are displayed on the created, customizable dashboard.
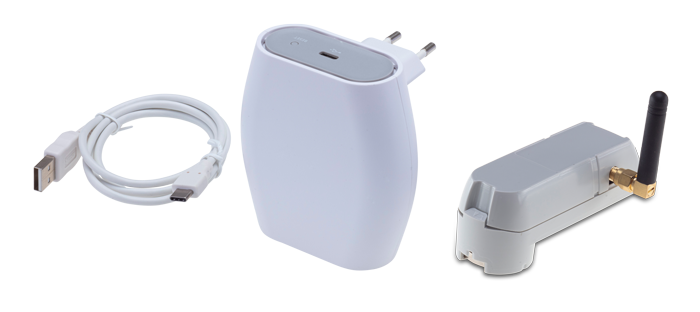
The KLAX Bundle contains the KLAX optical readout device for electricity and gas meters and The Things Indoor Gateway (TTIG) from TTN. This provides a combined product of a gateway and a sensor that is designed to be plug & play. KLAX is an attachment for the integrated optical interface that is simply attached by magnet. The sensor automatically collects data at consumption meters and enables them to be transmitted continuously. With the low-cost gateway, private users can set up a sensor-based Internet-of-Things (IoT) based on LoRaWAN.
FAQs regarding KLAX
Currently, the KLAX is only available with the European frequency 868 MHz.
The listed meters are the devices where we have tested it. Ideally, the KLAX can interpret the data coming from the meter and then transmit the readings via LoRaWAN. Due to the variety of devices on the market, our white list is not complete, but is constantly growing.
The The Things Indoor Gateway does not have to be directly with the KLAX stand. The prerequisite is that the Gateway a radio connection (LoRaWAN) to the KLAX sensor. Usually this is not a problem inside buildings, so the gateway can be placed in a room where it has access to a network connection. However, the connection quality between the gateway and KLAX, similar to an ordinary WLAN, depends on factors such as the condition of the walls and varies from case to case.
You can refer to https://www.thethingsnetwork.org/ or on your preferred LNS and view your data there. This is completely independent of whether you are on your private network or, for example, on the WLAN of a café in New York.
No, this cannot be avoided. However, since your data packets are encrypted and your sensor is not known to the foreign LNS, the risk is manageable. If you transmit critical data via LoRaWAN, we can advise you on further data protection measures.